> ## Documentation Index
> Fetch the complete documentation index at: https://docs-dev.auth0-mintlify.app/llms.txt
> Use this file to discover all available pages before exploring further.
# On-Behalf-Of Token Exchange
> Learn how to use the On-Behalf-Of (OBO) token exchange to enable middle-tier services to preserve user identity and permissions when calling downstream APIs.
The On-Behalf-Of (OBO) Token Exchange ([RFC 8693](https://www.rfc-editor.org/rfc/rfc8693.html)) enables middle-tier services to preserve user identity and permissions when calling downstream APIs.
When an application needs to call a downstream API, it can use:
* [Client Credentials Flow](/docs/get-started/authentication-and-authorization-flow/client-credentials-flow): The application acts on its own behalf and authenticates as itself. The request may have been initiated by a user, but that context will be lost. The downstream service only knows the identity of the calling application.
* On-Behalf-Of (OBO) Token Exchange: The application receives a user-scoped token and can exchange it for a new token to call downstream services. This preserves the identity and context of the original end user throughout the call chain.
For example, if a user triggers a call to Service A, which then calls Service B, OBO token exchange allows Service A to exchange the user's access token for a new token that:
* Maintains the original user's identity and permissions
* Is scoped specifically for Service B
* Enables Service B to make authorization decisions based on the end user
OBO token exchanges trigger the [`post-login` Action trigger](/docs/customize/actions/explore-triggers/signup-and-login-triggers/login-trigger), where:
* The [`event.transaction.protocol`](/docs/customize/actions/explore-triggers/signup-and-login-triggers/login-trigger/post-login-event-object#param-protocol) is set to `oauth2-token-exchange`.
* The [`event.transaction.actor`](/docs/customize/actions/explore-triggers/signup-and-login-triggers/login-trigger/post-login-event-object#param-actor) tracks the complete delegation chain.
Similar to a standard login flow, the scopes returned for downstream API calls are based on the user's [Role-Based Access Control (RBAC)](/docs/manage-users/access-control/rbac) policies.
When you purchase the Auth0 for AI Agents add-on, you can use your subscription tier's maximum Authentication API rate limit for OBO token exchanges. For example, if you are on [Private Cloud 100 RPS](/docs/troubleshoot/customer-support/operational-policies/rate-limit-policy/rate-limit-configurations/tier-100-rps-private-cloud), you can exceed the OBO token exchange rate limit of 30 RPS and leverage the full 100 RPS capacity for your OBO token exchange requests. The Authentication API limit is shared and acts as the global ceiling for all Authentication API requests, including logins, token refreshes, and token exchanges combined. Reach out to your Technical Account Manager for more information.
## Use cases
Common use cases for the OBO Token Exchange include:
* MCP servers that need to call first-party APIs on the user's behalf
* Microservices that need to call downstream services on the user's behalf
To enable your applications to call third-party APIs on the user's behalf, use [Token Vault](/docs/secure/call-apis-on-users-behalf/token-vault).
## How it works
OBO token exchange enables middle-tier services to exchange an incoming user token for a new token scoped to a downstream service. The new token preserves the original user's identity while tracking the chain of services involved in the JSON Web Token (JWT) payload.
### Example: MCP server calls first-party API
A user authenticates with Auth0 to a client application, which then calls an MCP server, which in turn needs to call a first-party API.
#### Step 1: User authentication
When the user logs in, Auth0 issues an access token scoped for the MCP server with the following claims in the JWT payload:
```json theme={null}
{
"sub": "auth0|user123",
"aud": "https://mcp-server.example.com",
"azp": "spa_client_id" // or "client_id" depending on token dialect
}
```
| Claim | Value | Description |
| ----------------------------------------------------------------------------------------------------------------------- | -------------------------------- | ----------------------------------------------- |
| `sub` | `auth0\|user123` | The end-user's identity |
| `aud` | `https://mcp-server.example.com` | Token scoped for the MCP server |
| `azp` (or `client_id` depending on the [Access token profile](/docs/secure/tokens/access-tokens/access-token-profiles)) | `spa_client_id` | The client application that requested the token |
#### Step 2: OBO exchange
Using the OBO token exchange, the MCP server presents the user's token to Auth0 and requests an access token scoped to the first-party API. Auth0 issues a new access token scoped for the API with the following claims:
```json theme={null}
{
"sub": "auth0|user123",
"aud": "https://first-party-api.example.com",
"azp": "mcp_server_client_id", // or "client_id" depending on token dialect
"act": {
"sub": "mcp_server_client_id",
"act": {
"sub": "spa_client_id"
}
}
}
```
| Claim | Value | Description |
| ----------------------------------------------------------------------------------------------------------------------- | ------------------------------------------------------------------------- | ---------------------------------------------------------------------------- |
| `sub` | `auth0\|user123` | Same user identity preserved |
| `aud` | `https://first-party-api.example.com` | Token scoped for the first-party API |
| `azp` (or `client_id` depending on the [Access token profile](/docs/secure/tokens/access-tokens/access-token-profiles)) | `mcp_server_client_id` | Client that requested the token (the MCP server that performed the exchange) |
| `act` | `{"sub": "mcp_server_client_id",`
`"act": {"sub": "spa_client_id"}}` | Delegation chain showing all actors involved |
#### The `act` claim
The `act` (actor) claim tracks the complete delegation chain. Each `act` level represents a service in the call chain, with the outermost `act.sub` identifying the current actor that performed the token exchange.
In our example:
* Outermost `act.sub`: `mcp_server_client_id` (the MCP server that just exchanged the token)
* Nested `act.sub`: `spa_client_id` (the original client application)
The `azp` claim should match the outermost `act.sub` value, identifying the service that most recently performed the token exchange.
If the first-party API calls another downstream service (`https://calendar-api.acme.com`), the delegation chain would extend:
```json theme={null}
{
"sub": "auth0|user123",
"aud": "https://calendar-api.acme.com",
"azp": "first_party_api_client_id",
"act": {
"sub": "first_party_api_client_id",
"act": {
"sub": "mcp_server_client_id",
"act": {
"sub": "spa_client_id"
}
}
}
}
```
The delegation chain is limited to five nested levels. The OBO token exchange will fail if the subject token already has five nested `act` levels.
```json theme={null}
400 Bad Request
{
"error": "invalid_request",
"error_description": "Delegation chain (`act` claim) depth exceeds the maximum allowed limit of 4"
}
```
Cache access tokens for the lifetime of the token instead of requesting a new token for each API call. Access tokens are reusable until they expire; repeated token exchanges waste resources, increase latency, and may trigger rate limits.
### User > MCP server > API flow
The following diagram shows an end-to-end OBO token exchange flow where an MCP server calls a first-party API on the user's behalf:
```mermaid theme={null}
sequenceDiagram
participant User
participant Client App
participant Auth0
participant MCP Server
participant First-Party API
Note over User,Auth0: Step 1: User Authentication
User->>Client App: Authenticates (Login)
Client App->>Auth0: Requests User Token
Auth0-->>Client App: Issues Token A
(aud: MCP Server, sub: UserX)
Note over Client App,MCP Server: Step 2: Initial Request
Client App->>MCP Server: Call Endpoint (Token A)
Note right of Client App: Authorization: Bearer [Token A]
Note over MCP Server,Auth0: Step 3: Validation and Token Exchange
activate MCP Server
MCP Server->>MCP Server: Validates Token A
MCP Server->>Auth0: POST /oauth/token (Token Exchange)
Note right of MCP Server: client_id: MCP_Server_Client_ID
subject_token: [Token A]
audience: First-Party API
Note over Auth0: Step 4: Token Issuance
activate Auth0
Auth0-->>MCP Server: Issues Token B
(aud: First-Party API, sub: UserX)
deactivate Auth0
Note right of Auth0: Token B contains act claim
showing MCP Server as the actor
Note over MCP Server,First-Party API: Step 5: Downstream Call
MCP Server->>First-Party API: Call Endpoint (Token B)
Note right of MCP Server: Authorization: Bearer [Token B]
activate First-Party API
First-Party API->>First-Party API: Validates Token B
Identifies subject as UserX
First-Party API-->>MCP Server: 200 OK (Data)
deactivate First-Party API
MCP Server-->>Client App: 200 OK (Processed Data)
deactivate MCP Server
```
1. **User authentication**: The user authenticates with the client application. The Auth0 Authorization Server issues Token A, scoped for the MCP server.
2. **Initial request**: The client application calls the MCP Server, passing Token A in the `Authorization: Bearer` header.
3. **Validation and token exchange**: The MCP server receives Token A, validates it, and passes it to the Auth0 Authorization Server's `/oauth/token` endpoint. Using the OBO token exchange, the MCP server presents Token A as the `subject_token` and requests a new token for the first-party API.
4. **Token issuance**: The Auth0 Authorization Server issues Token B. Token B has the same `sub` (user ID) as Token A, but the `aud` (audience) is now the first-party API.
5. **Downstream call**: The MCP Server calls the first-party API using Token B. The API validates Token B and sees that the request is legitimately being made "on behalf of" the original user.
### User > API1 > API2 > API3
The following diagram shows an end-to-end flow of a chain of microservices making downstream calls on the user's behalf:
```mermaid theme={null}
sequenceDiagram
participant User
participant Client App
participant Auth0
participant API1
participant API2
participant API3
Note over User,Auth0: Step 1: User Authentication
User->>Client App: Authenticates (Login)
Client App->>Auth0: Requests User Token
Auth0-->>Client App: Issues Token A
(aud: API1, sub: UserX)
Note over Client App,API1: Step 2: Initial Request
Client App->>API1: Call Endpoint (Token A)
Note right of Client App: Authorization: Bearer [Token A]
Note over API1,Auth0: Step 3: API1 Delegates to API2
activate API1
API1->>API1: Validates Token A
API1->>Auth0: POST /oauth/token (Token Exchange)
Note right of API1: client_id: API1_ID
subject_token: [Token A]
audience: API2
Note over Auth0: Step 4: Token Issuance
activate Auth0
Auth0-->>API1: Issues Token B
(aud: API2, sub: UserX)
deactivate Auth0
Note right of Auth0: Token B contains act claim
showing API1 as actor
Note over API1,API2: Step 5: Downstream Call
API1->>API2: Call Endpoint (Token B)
Note right of API1: Authorization: Bearer [Token B]
activate API2
API2->>API2: Validates Token B
Identifies subject as UserX
Note over API2,Auth0: Step 6: API2 Delegates to API3
API2->>Auth0: POST /oauth/token (Token Exchange)
Note right of API2: client_id: API2_ID
subject_token: [Token B]
audience: API3
activate Auth0
Note over Auth0: Step 7: Token Issuance
Auth0-->>API2: Issues Token C
(aud: API3, sub: UserX)
deactivate Auth0
Note right of Auth0: Token C contains act claim
showing API2 as actor
Note over API2,API3: Step 8: Downstream Call
API2->>API3: Call Endpoint (Token C)
Note right of API2: Authorization: Bearer [Token C]
activate API3
API3->>API3: Validates Token C
Identifies subject as UserX
API3-->>API2: 200 OK
deactivate API3
API2-->>API1: 200 OK (Data)
deactivate API2
API1-->>Client App: 200 OK (Processed Data)
deactivate API1
```
1. **User authentication**: The user successfully authenticates with a client application. The Auth0 Authorization Server issues Token A, scoped for API1.
2. **Initial request**: The client application calls API1, passing Token A in the `Authorization: Bearer` header.
3. **API1 delegates to API2**: API1 receives Token A, validates it, then passes it to the Auth0 Authorization Server's `/oauth/token` endpoint. Using the OBO token exchange, API1 presents Token A as the `subject_token` and requests a new token for API2.
4. **Token issuance**: The Auth0 Authorization Server grants a new access token, Token B, to API1. Token B has the same `sub` (user ID) as Token A, but the `aud` (audience) is now API2.
5. **Downstream call**: API1 makes a request to API2 using Token B.
6. **API2 delegates to API3**: API2 receives Token B, validates it, then passes it to the Auth0 Authorization Server's `/oauth/token` endpoint. Using the OBO token exchange, API2 presents Token B as the `subject_token` and requests a new token for API3.
7. **Token issuance**: The Auth0 Authorization Server grants a new access token, Token C, to API2. Token C has the same `sub` (user ID) as Token A and B, but the `aud` (audience) is now API3.
8. **Downstream call**: API2 makes a request to API3 using Token C. API3 validates Token C and sees that the request is legitimately being made "on behalf of" the original user.
## Prerequisites
Only Custom API clients associated with a resource server can use the OBO token exchange. A Custom API client is linked to a resource server when they share the same identifier.
Custom API clients have the following requirements:
* Set `app_type` to `resource_server`.
* Set `resource_server_identifier` to the valid resource server, i.e., `https://my-api.example.com`. Auth0 uses the resource server identifier as the audience parameter in authorization calls.
Because Custom API clients are first-party clients, make sure you [skip user consent](/docs/get-started/applications/confidential-and-public-applications/user-consent-and-third-party-applications#skip-consent-for-first-party-applications) for the APIs your first-party client needs to access.
### Create Custom API client
You can create a Custom API client using the Auth0 Dashboard or Management API.
To create a Custom API client in the Auth0 Dashboard:
1. Navigate to [**Applications > APIs**](https://manage.auth0.com/#/apis) and select your backend API.
 2. Select **Add Application** and enter an application name.
3. Select **Add**.
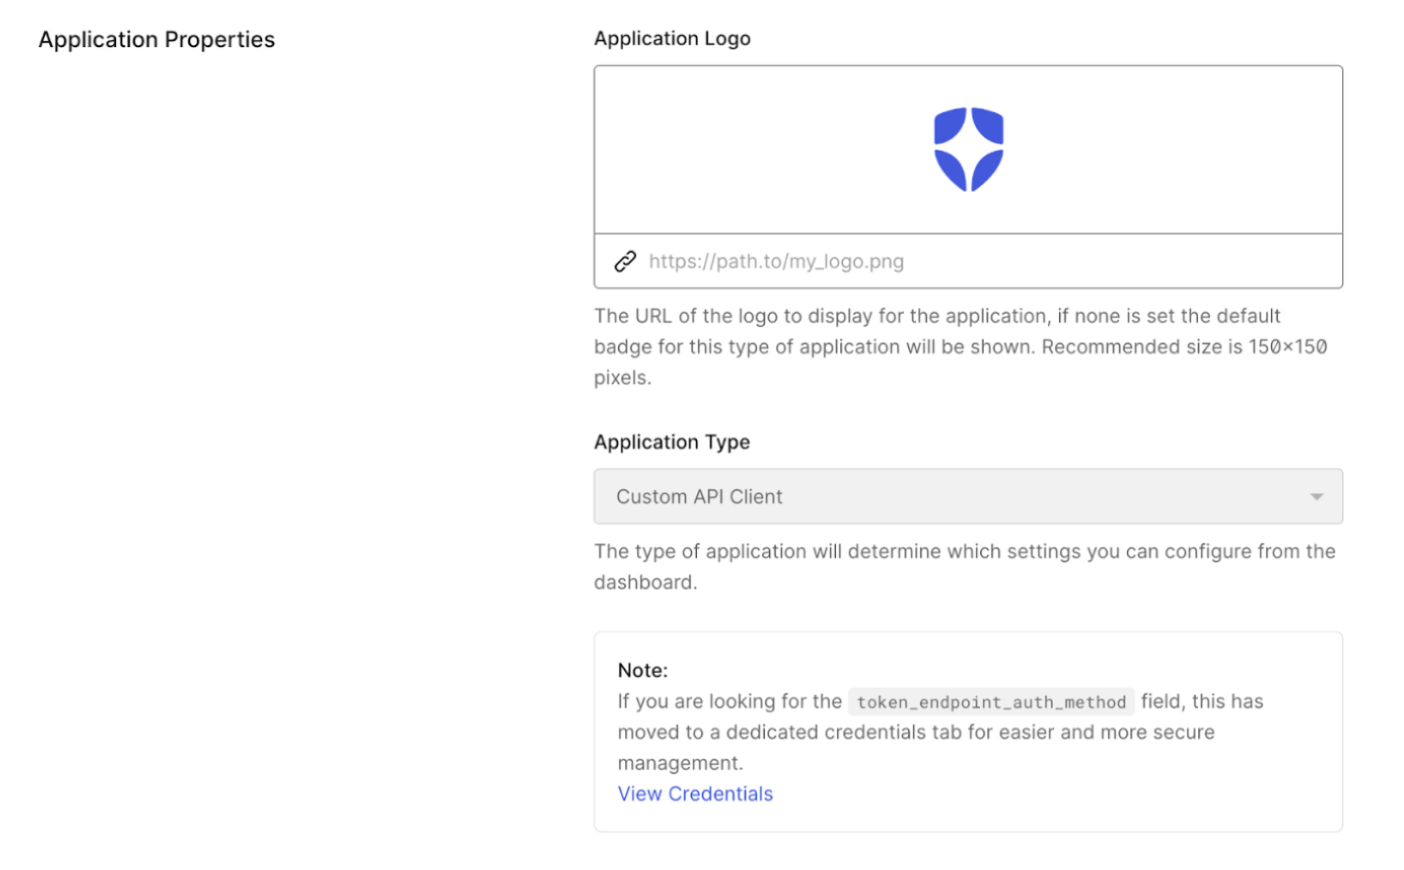
Once the application has been successfully created, review it by selecting **Configure Application**, then scroll to **Application Properties**. The **Application Type** is a **Custom API Client**.
2. Select **Add Application** and enter an application name.
3. Select **Add**.
Once the application has been successfully created, review it by selecting **Configure Application**, then scroll to **Application Properties**. The **Application Type** is a **Custom API Client**.
 To create a Custom API client with the same identifier as your resource server, make a `POST` request to the [`/api/v2/clients`](https://auth0.com/docs/api/management/v2/clients/post-clients) endpoint with the following request body:
```bash theme={null}
curl --request POST 'https://{yourDomain}/api/v2/clients' \
--header 'Content-Type: application/json' \
--header 'Authorization: Bearer YOUR_MANAGEMENT_API_TOKEN' \
--data '{
"name": "Custom API Client",
"app_type": "resource_server",
"resource_server_identifier": "https://my-api.example.com"
}'
```
| Parameter | Description |
| ---------------------------- | -------------------------------------------------------------------------------------------------------------------------------- |
| `name` | Name of your Custom API Client. |
| `app_type` | The application type of your Custom API Client. Set to `resource_server`. |
| `resource_server_identifier` | The unique identifier for your Custom API Client. Set to the audience of your resource server i.e. `https://my-api.example.com`. |
### Create client grant
You need to create a user-delegated client grant between the Custom API client and the downstream API to authorize access.
1. Navigate to [**Applications > Applications**](https://manage.auth0.com/#/applications) and select your Custom API client.
2. Under **API Access**, find your resource server (i.e., `https://my-api.example.com`) and select **Edit**.
3. Under **User-Delegated Access**, select **Grant Access**, then select the permissions you want to grant or **Always grant all permissions**.
4. Select **Save**.
Make a `POST` request to the [`/api/v2/client-grants`](https://auth0.com/docs/api/management/v2/client-grants/post-client-grants) endpoint with the following request body:
```bash theme={null}
curl --location 'https://{yourDomain}/api/v2/client-grants' \
--header 'Content-Type: application/json' \
--header 'Authorization: Bearer YOUR_MANAGEMENT_API_TOKEN' \
--data '{
"client_id": "YOUR_CLIENT_ID",
"audience": "https://my-api.example.com",
"scope": [
"read:item"
],
"subject_type": "user"
}'
```
### Configure the OBO token exchange
Learn how to configure your Custom API client with the OBO token exchange grant.
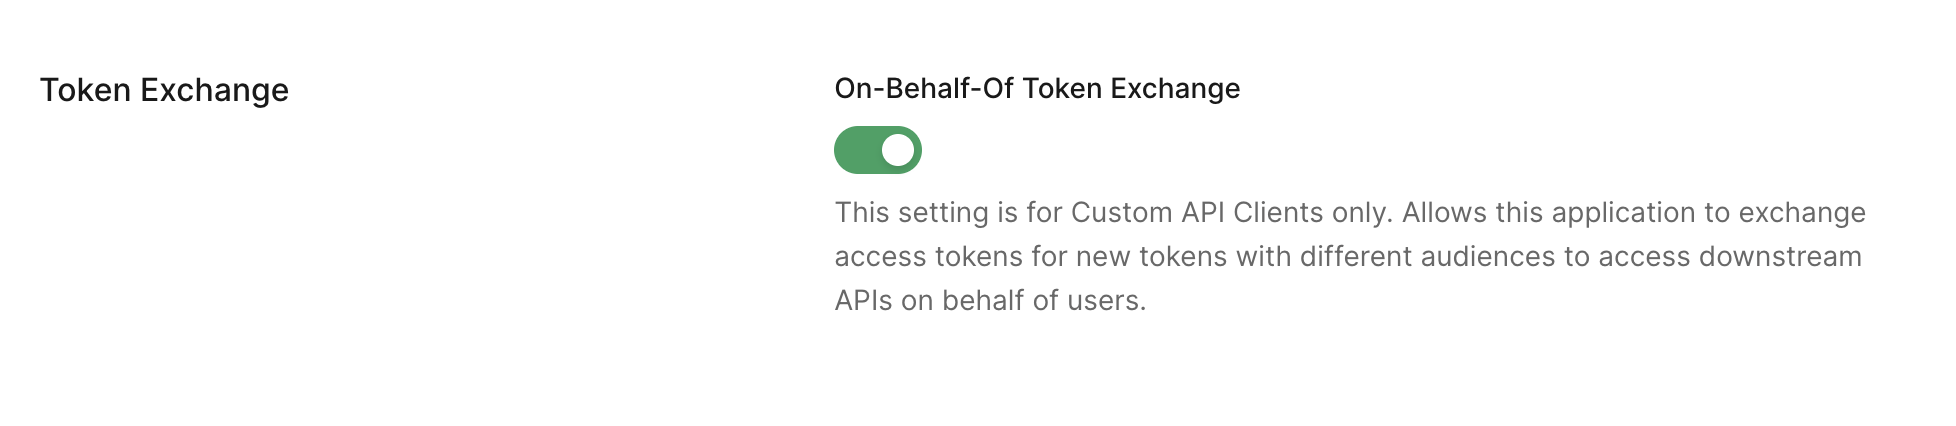
1. Navigate to **Applications > Applications** and select your Custom API client.
2. Under **Token Exchange**, toggle on **On-Behalf-Of Token Exchange**.
3. Select **Save**.
To create a Custom API client with the same identifier as your resource server, make a `POST` request to the [`/api/v2/clients`](https://auth0.com/docs/api/management/v2/clients/post-clients) endpoint with the following request body:
```bash theme={null}
curl --request POST 'https://{yourDomain}/api/v2/clients' \
--header 'Content-Type: application/json' \
--header 'Authorization: Bearer YOUR_MANAGEMENT_API_TOKEN' \
--data '{
"name": "Custom API Client",
"app_type": "resource_server",
"resource_server_identifier": "https://my-api.example.com"
}'
```
| Parameter | Description |
| ---------------------------- | -------------------------------------------------------------------------------------------------------------------------------- |
| `name` | Name of your Custom API Client. |
| `app_type` | The application type of your Custom API Client. Set to `resource_server`. |
| `resource_server_identifier` | The unique identifier for your Custom API Client. Set to the audience of your resource server i.e. `https://my-api.example.com`. |
### Create client grant
You need to create a user-delegated client grant between the Custom API client and the downstream API to authorize access.
1. Navigate to [**Applications > Applications**](https://manage.auth0.com/#/applications) and select your Custom API client.
2. Under **API Access**, find your resource server (i.e., `https://my-api.example.com`) and select **Edit**.
3. Under **User-Delegated Access**, select **Grant Access**, then select the permissions you want to grant or **Always grant all permissions**.
4. Select **Save**.
Make a `POST` request to the [`/api/v2/client-grants`](https://auth0.com/docs/api/management/v2/client-grants/post-client-grants) endpoint with the following request body:
```bash theme={null}
curl --location 'https://{yourDomain}/api/v2/client-grants' \
--header 'Content-Type: application/json' \
--header 'Authorization: Bearer YOUR_MANAGEMENT_API_TOKEN' \
--data '{
"client_id": "YOUR_CLIENT_ID",
"audience": "https://my-api.example.com",
"scope": [
"read:item"
],
"subject_type": "user"
}'
```
### Configure the OBO token exchange
Learn how to configure your Custom API client with the OBO token exchange grant.
1. Navigate to **Applications > Applications** and select your Custom API client.
2. Under **Token Exchange**, toggle on **On-Behalf-Of Token Exchange**.
3. Select **Save**.
 Make a `PATCH` request to the [`/api/v2/clients/{clientId}`](https://auth0.com/docs/api/management/v2/clients/patch-clients-by-id) endpoint with the following request body:
```bash theme={null}
curl --location --request PATCH 'https://{yourDomain}/api/v2/clients/{clientId}' \
--header 'Content-Type: application/json' \
--header 'Authorization: Bearer YOUR_MANAGEMENT_API_TOKEN' \
--data '{
"token_exchange": {
"allow_any_profile_of_type": ["on_behalf_of_token_exchange"]
}
}'
```
## Perform OBO token exchange
To perform the OBO token exchange, you can use [`auth0-api-js`](https://github.com/auth0/auth0-auth-js), [`auth0_api_python`](https://github.com/auth0/auth0-api-python), or the [Authentication API](https://auth0.com/docs/api/authentication).
Cache access tokens for the lifetime of the token instead of requesting a new token for each API call. Access tokens are reusable until they expire; repeated token exchanges waste resources, increase latency, and may trigger rate limits.
Before you begin, make sure you've installed the [`auth0-api-js`](https://github.com/auth0/auth0-auth-js) library and its dependencies.
First, initialize the `ApiClient` with your MCP server's credentials:
```javascript theme={null}
import { ApiClient } from '@auth0/auth0-api-js';
const apiClient = new ApiClient({
domain: 'YOUR_AUTH0_DOMAIN',
audience: 'YOUR_MCP_SERVER_AUDIENCE',
clientId: 'YOUR_CLIENT_ID',
clientSecret: 'YOUR_CLIENT_SECRET',
});
```
Then, use the `getTokenOnBehalfOf()` method to exchange tokens:
```javascript theme={null}
const result = await apiClient.getTokenOnBehalfOf(accessToken, {
audience: 'YOUR_DOWNSTREAM_API_AUDIENCE',
scope: 'read:private', // Optional
});
```
`getTokenOnBehalfOf()` returns an object containing:
* `accessToken`: The new token for your downstream API
* `scope`: The granted scopes
* `expiresIn`: Token expiration time in seconds
Before you begin, make sure you've installed the [`auth0_api_python`](https://github.com/auth0/auth0-api-python) library and its dependencies.
First, import the necessary classes and initialize the `ApiClient` with your MCP server's credentials:
```python theme={null}
from auth0_api_python import ApiClient, ApiClientOptions
api_client = ApiClient(
ApiClientOptions(
domain='YOUR_AUTH0_DOMAIN',
audience='YOUR_MCP_SERVER_AUDIENCE',
client_id='YOUR_CLIENT_ID',
client_secret='YOUR_CLIENT_SECRET',
)
)
```
Then, use the `get_token_on_behalf_of()` method to exchange tokens:
```python theme={null}
result = await api_client.get_token_on_behalf_of(
access_token=access_token,
audience='YOUR_DOWNSTREAM_API_AUDIENCE',
scope='read:private' # Optional
)
```
`get_token_on_behalf_of()` returns a dictionary containing:
* `access_token`: The new token for your downstream API
* `scope`: The granted scopes
* `expires_in`: Token expiration time in seconds
Make a `POST` request to the `/oauth/token` endpoint with the following request body:
```bash theme={null}
curl --location 'https://YOUR_DOMAIN.us.auth0.com/oauth/token' \
--header 'Content-Type: application/json' \
--data '{
"client_id": "YOUR_CLIENT_ID",
"client_secret": "YOUR_CLIENT_SECRET",
"subject_token": "AUTH0_SUBJECT_TOKEN",
"grant_type": "urn:ietf:params:oauth:grant-type:token-exchange",
"subject_token_type": "urn:ietf:params:oauth:token-type:access_token",
"requested_token_type": "urn:ietf:params:oauth:token-type:access_token",
"audience": "https://my-api.example.com"
}'
```
| Parameter | Example | Description |
| ---------------------- | ------------------------------------------------- | ------------------------------------------------------------------------------------------------------------------------------------------------------------------------------------------------------ |
| `grant_type` | `urn:ietf:params:oauth:grant-type:token-exchange` | Required. Tells the Authorization Server to perform an exchange rather than a standard login. |
| `client_id` | `` | Required. The Unique ID of the middle-tier service making the request. |
| `client_secret` | `` | Optional. The secret (or assertion) used to authenticate the middle-tier service itself. You can use any client authentication method; however, you cannot set `token_endpoint_auth_method` to `none`. |
| `subject_token` | `` | Required. The incoming token from the user/client that the middle-tier service is currently holding. |
| `subject_token_type` | `urn:ietf:params:oauth:token-type:access_token` | Required. Defines the format of the `subject_token` (e.g., an access token vs. an ID Token). |
| `requested_token_type` | `urn:ietf:params:oauth:token-type:access_token` | Required. Indicates what kind of token you want back (usually an access token for the next API). |
| `audience` | `https://my-api.example.com` | Required. The identifier for the downstream service that will receive and validate the new token. |
| `scope` | `read:data write:data` | Optional. A space-delimited list of specific permissions requested for the downstream call. |
If successful, you should receive a response like the following:
```json theme={null}
{
"access_token": "YOUR_AUTH0_ACCESS_TOKEN",
"expires_in": 86400,
"token_type": "Bearer",
"issued_token_type": "urn:ietf:params:oauth:token-type:access_token"
}
```
| Parameter | Example | Description |
| ------------------- | ----------------------------------------------- | ---------------------------------------------------------------------------------------------------------------------------------------------------------------------------------------------------------------------------------------- |
| `access_token` | `eyJ...` | The "new" Auth0 access token. This is the JWT or opaque string that the middle-tier service will use to call the downstream API. |
| `issued_token_type` | `urn:ietf:params:oauth:token-type:access_token` | Confirms the format of the token returned. This matches (or is a subset of) the `requested_token_type` from your request. |
| `token_type` | `Bearer` | Specifies the authentication scheme in the `Authorization` header. For OBO, this is `Bearer` unless the middle-tier service and downstream API are using DPoP, in which case `DPoP` will be used. |
| `expires_in` | `3600` | The lifetime of the token in seconds depending on the configuration of the downstream API. Note that this is often shorter than the original user token. |
| `scope` | `read:data` | The specific permissions granted for the token. You have to enable these permissions using a [user-delegated access client grant](/docs/get-started/applications/application-access-to-apis-client-grants#user-access-vs-client-access). |
## Token binding
When tokens are sender-constrained using [DPoP](/docs/secure/sender-constraining/demonstrating-proof-of-possession-dpop) or [mTLS](/docs/secure/sender-constraining/mtls-sender-constraining), only the specific holder of the key or certificate can prove possession and use the token.
During an OBO exchange, the [middle-tier service](/docs/secure/call-apis-on-users-behalf/on-behalf-of-token-exchange) holds the token.
Auth0 cannot cryptographically verify that the middle-tier service holds the original holder's key or certificate, so it does not re-verify the original token's binding during the exchange.
The middle-tier service is responsible for:
* Verifying token binding
* Binding new tokens
* Managing binding switch mechanism between DPoP and mTLS
Verifying token binding is the responsibility of the middle-tier service. Binding is a cryptographic proof that the token holder possesses the original holder's key or certificate. Before exchanging a bound token, validate that the original token's binding is verified:
* DPoP: Compute the JWK SHA-256 thumbprint of the `jwk` in the incoming DPoP proof (per [RFC 7638](https://www.rfc-editor.org/rfc/rfc7638)) and verify it matches the `cnf.jkt` claim in the subject token. Auth0 does not perform this check during token exchange.
* mTLS: Compute the base64url-encoded SHA-256 thumbprint of the client certificate's DER encoding and verify it matches the `cnf.x5t#S256` claim in the subject token.
If validation fails, reject the request without attempting the exchange.
**Binding the new token**: Auth0 will sender-constrain the newly issued access token when the [downstream resource server has sender-constraining enabled or required](/docs/secure/sender-constraining), and the middle-tier service presents a valid DPoP proof or mTLS certificate to the `/oauth/token` endpoint.
| **Mechanism** | **How to bind the new token** |
| ------------- | ------------------------------------------------------------------------------------------------------------------------------------------------------------------------------------------------------------------------------------------------------------------------------------------------------------------------------------------------------------------------- |
| DPoP | Include a freshly generated `DPoP` proof header in the `/oauth/token` request. The proof must be scoped to this request: set `htm` to `POST` and `htu` to your Auth0 tenant's `/oauth/token` endpoint URI. The issued token will be DPoP-bound and `token_type` in the response will be `DPoP`. |
| mTLS | For mTLS binding, OBO token exchange requires mutual TLS, where the intermediate service must authenticate with a client certificate, not just rely on server-side TLS. The certificate must be [provisioned to the middle-tier client in Auth0](/docs/get-started/applications/configure-mtls). Auth0 will issue a token containing a `cnf.x5t#S256` confirmation claim. |
If neither a DPoP proof nor an mTLS certificate is presented, Auth0 issues an unbound bearer token regardless of the original subject token's binding status.
**Binding mechanism transitions and mismatched capabilities**: The middle-tier service can switch binding mechanisms during an OBO exchange (for example, from DPoP to mTLS), provided it possesses the necessary credentials for the new mechanism (for example, a provisioned mTLS certificate). The newly issued token reflects the new binding type.
Before exchanging, verify that the downstream API supports the binding mechanism you are presenting. Auth0 does not validate mechanism compatibility; it will issue the token regardless. If the downstream API does not support the presented mechanism, it will reject the token at runtime. If mechanisms cannot be reconciled, do not attempt the exchange; return an error to the caller instead.
**DPoP nonces**: If the original subject token was issued to a public client (such as a SPA or mobile app) using DPoP with a server-issued nonce, the middle-tier service may not have a valid nonce for re-binding at the `/oauth/token` endpoint. In this case, Auth0 returns a `use_dpop_nonce` error with a fresh nonce in the `DPoP-Nonce` response header. Retry the request using that nonce in the new DPoP proof.
If the original subject token was sender-constrained but the middle-tier service does not present binding credentials (DPoP proof or mTLS certificate) to the `/oauth/token` endpoint, Auth0 does not reject the request; instead, it issues an unbound bearer token without an error signal. The downstream API will accept it without proof of possession, making it replayable if intercepted. If the downstream resource server requires sender-constrained tokens, do not forward the unbound token. Reject it and return an error to the caller.
## Organizations support
When a user authenticates through an organization, the access token includes an `org_id` claim. OBO token exchange preserves this organization context throughout the delegation chain.
When Auth0 receives an OBO token exchange request with an org-bound access token, it validates:
* The `org_id` exists in your tenant
* The user (identified by `sub`) is a member of that organization
If validation fails, Auth0 rejects the token exchange request. If successful, Auth0 issues a new access token that:
* Contains the same `org_id` claim as the original token
* Applies the same organization-specific RBAC policies
* Makes the organization context available in the [`post-login` Actions trigger](/docs/customize/actions/explore-triggers/signup-and-login-triggers/login-trigger/post-login-event-object#event-organization) via the `event.organization` property
Make a `PATCH` request to the [`/api/v2/clients/{clientId}`](https://auth0.com/docs/api/management/v2/clients/patch-clients-by-id) endpoint with the following request body:
```bash theme={null}
curl --location --request PATCH 'https://{yourDomain}/api/v2/clients/{clientId}' \
--header 'Content-Type: application/json' \
--header 'Authorization: Bearer YOUR_MANAGEMENT_API_TOKEN' \
--data '{
"token_exchange": {
"allow_any_profile_of_type": ["on_behalf_of_token_exchange"]
}
}'
```
## Perform OBO token exchange
To perform the OBO token exchange, you can use [`auth0-api-js`](https://github.com/auth0/auth0-auth-js), [`auth0_api_python`](https://github.com/auth0/auth0-api-python), or the [Authentication API](https://auth0.com/docs/api/authentication).
Cache access tokens for the lifetime of the token instead of requesting a new token for each API call. Access tokens are reusable until they expire; repeated token exchanges waste resources, increase latency, and may trigger rate limits.
Before you begin, make sure you've installed the [`auth0-api-js`](https://github.com/auth0/auth0-auth-js) library and its dependencies.
First, initialize the `ApiClient` with your MCP server's credentials:
```javascript theme={null}
import { ApiClient } from '@auth0/auth0-api-js';
const apiClient = new ApiClient({
domain: 'YOUR_AUTH0_DOMAIN',
audience: 'YOUR_MCP_SERVER_AUDIENCE',
clientId: 'YOUR_CLIENT_ID',
clientSecret: 'YOUR_CLIENT_SECRET',
});
```
Then, use the `getTokenOnBehalfOf()` method to exchange tokens:
```javascript theme={null}
const result = await apiClient.getTokenOnBehalfOf(accessToken, {
audience: 'YOUR_DOWNSTREAM_API_AUDIENCE',
scope: 'read:private', // Optional
});
```
`getTokenOnBehalfOf()` returns an object containing:
* `accessToken`: The new token for your downstream API
* `scope`: The granted scopes
* `expiresIn`: Token expiration time in seconds
Before you begin, make sure you've installed the [`auth0_api_python`](https://github.com/auth0/auth0-api-python) library and its dependencies.
First, import the necessary classes and initialize the `ApiClient` with your MCP server's credentials:
```python theme={null}
from auth0_api_python import ApiClient, ApiClientOptions
api_client = ApiClient(
ApiClientOptions(
domain='YOUR_AUTH0_DOMAIN',
audience='YOUR_MCP_SERVER_AUDIENCE',
client_id='YOUR_CLIENT_ID',
client_secret='YOUR_CLIENT_SECRET',
)
)
```
Then, use the `get_token_on_behalf_of()` method to exchange tokens:
```python theme={null}
result = await api_client.get_token_on_behalf_of(
access_token=access_token,
audience='YOUR_DOWNSTREAM_API_AUDIENCE',
scope='read:private' # Optional
)
```
`get_token_on_behalf_of()` returns a dictionary containing:
* `access_token`: The new token for your downstream API
* `scope`: The granted scopes
* `expires_in`: Token expiration time in seconds
Make a `POST` request to the `/oauth/token` endpoint with the following request body:
```bash theme={null}
curl --location 'https://YOUR_DOMAIN.us.auth0.com/oauth/token' \
--header 'Content-Type: application/json' \
--data '{
"client_id": "YOUR_CLIENT_ID",
"client_secret": "YOUR_CLIENT_SECRET",
"subject_token": "AUTH0_SUBJECT_TOKEN",
"grant_type": "urn:ietf:params:oauth:grant-type:token-exchange",
"subject_token_type": "urn:ietf:params:oauth:token-type:access_token",
"requested_token_type": "urn:ietf:params:oauth:token-type:access_token",
"audience": "https://my-api.example.com"
}'
```
| Parameter | Example | Description |
| ---------------------- | ------------------------------------------------- | ------------------------------------------------------------------------------------------------------------------------------------------------------------------------------------------------------ |
| `grant_type` | `urn:ietf:params:oauth:grant-type:token-exchange` | Required. Tells the Authorization Server to perform an exchange rather than a standard login. |
| `client_id` | `` | Required. The Unique ID of the middle-tier service making the request. |
| `client_secret` | `` | Optional. The secret (or assertion) used to authenticate the middle-tier service itself. You can use any client authentication method; however, you cannot set `token_endpoint_auth_method` to `none`. |
| `subject_token` | `` | Required. The incoming token from the user/client that the middle-tier service is currently holding. |
| `subject_token_type` | `urn:ietf:params:oauth:token-type:access_token` | Required. Defines the format of the `subject_token` (e.g., an access token vs. an ID Token). |
| `requested_token_type` | `urn:ietf:params:oauth:token-type:access_token` | Required. Indicates what kind of token you want back (usually an access token for the next API). |
| `audience` | `https://my-api.example.com` | Required. The identifier for the downstream service that will receive and validate the new token. |
| `scope` | `read:data write:data` | Optional. A space-delimited list of specific permissions requested for the downstream call. |
If successful, you should receive a response like the following:
```json theme={null}
{
"access_token": "YOUR_AUTH0_ACCESS_TOKEN",
"expires_in": 86400,
"token_type": "Bearer",
"issued_token_type": "urn:ietf:params:oauth:token-type:access_token"
}
```
| Parameter | Example | Description |
| ------------------- | ----------------------------------------------- | ---------------------------------------------------------------------------------------------------------------------------------------------------------------------------------------------------------------------------------------- |
| `access_token` | `eyJ...` | The "new" Auth0 access token. This is the JWT or opaque string that the middle-tier service will use to call the downstream API. |
| `issued_token_type` | `urn:ietf:params:oauth:token-type:access_token` | Confirms the format of the token returned. This matches (or is a subset of) the `requested_token_type` from your request. |
| `token_type` | `Bearer` | Specifies the authentication scheme in the `Authorization` header. For OBO, this is `Bearer` unless the middle-tier service and downstream API are using DPoP, in which case `DPoP` will be used. |
| `expires_in` | `3600` | The lifetime of the token in seconds depending on the configuration of the downstream API. Note that this is often shorter than the original user token. |
| `scope` | `read:data` | The specific permissions granted for the token. You have to enable these permissions using a [user-delegated access client grant](/docs/get-started/applications/application-access-to-apis-client-grants#user-access-vs-client-access). |
## Token binding
When tokens are sender-constrained using [DPoP](/docs/secure/sender-constraining/demonstrating-proof-of-possession-dpop) or [mTLS](/docs/secure/sender-constraining/mtls-sender-constraining), only the specific holder of the key or certificate can prove possession and use the token.
During an OBO exchange, the [middle-tier service](/docs/secure/call-apis-on-users-behalf/on-behalf-of-token-exchange) holds the token.
Auth0 cannot cryptographically verify that the middle-tier service holds the original holder's key or certificate, so it does not re-verify the original token's binding during the exchange.
The middle-tier service is responsible for:
* Verifying token binding
* Binding new tokens
* Managing binding switch mechanism between DPoP and mTLS
Verifying token binding is the responsibility of the middle-tier service. Binding is a cryptographic proof that the token holder possesses the original holder's key or certificate. Before exchanging a bound token, validate that the original token's binding is verified:
* DPoP: Compute the JWK SHA-256 thumbprint of the `jwk` in the incoming DPoP proof (per [RFC 7638](https://www.rfc-editor.org/rfc/rfc7638)) and verify it matches the `cnf.jkt` claim in the subject token. Auth0 does not perform this check during token exchange.
* mTLS: Compute the base64url-encoded SHA-256 thumbprint of the client certificate's DER encoding and verify it matches the `cnf.x5t#S256` claim in the subject token.
If validation fails, reject the request without attempting the exchange.
**Binding the new token**: Auth0 will sender-constrain the newly issued access token when the [downstream resource server has sender-constraining enabled or required](/docs/secure/sender-constraining), and the middle-tier service presents a valid DPoP proof or mTLS certificate to the `/oauth/token` endpoint.
| **Mechanism** | **How to bind the new token** |
| ------------- | ------------------------------------------------------------------------------------------------------------------------------------------------------------------------------------------------------------------------------------------------------------------------------------------------------------------------------------------------------------------------- |
| DPoP | Include a freshly generated `DPoP` proof header in the `/oauth/token` request. The proof must be scoped to this request: set `htm` to `POST` and `htu` to your Auth0 tenant's `/oauth/token` endpoint URI. The issued token will be DPoP-bound and `token_type` in the response will be `DPoP`. |
| mTLS | For mTLS binding, OBO token exchange requires mutual TLS, where the intermediate service must authenticate with a client certificate, not just rely on server-side TLS. The certificate must be [provisioned to the middle-tier client in Auth0](/docs/get-started/applications/configure-mtls). Auth0 will issue a token containing a `cnf.x5t#S256` confirmation claim. |
If neither a DPoP proof nor an mTLS certificate is presented, Auth0 issues an unbound bearer token regardless of the original subject token's binding status.
**Binding mechanism transitions and mismatched capabilities**: The middle-tier service can switch binding mechanisms during an OBO exchange (for example, from DPoP to mTLS), provided it possesses the necessary credentials for the new mechanism (for example, a provisioned mTLS certificate). The newly issued token reflects the new binding type.
Before exchanging, verify that the downstream API supports the binding mechanism you are presenting. Auth0 does not validate mechanism compatibility; it will issue the token regardless. If the downstream API does not support the presented mechanism, it will reject the token at runtime. If mechanisms cannot be reconciled, do not attempt the exchange; return an error to the caller instead.
**DPoP nonces**: If the original subject token was issued to a public client (such as a SPA or mobile app) using DPoP with a server-issued nonce, the middle-tier service may not have a valid nonce for re-binding at the `/oauth/token` endpoint. In this case, Auth0 returns a `use_dpop_nonce` error with a fresh nonce in the `DPoP-Nonce` response header. Retry the request using that nonce in the new DPoP proof.
If the original subject token was sender-constrained but the middle-tier service does not present binding credentials (DPoP proof or mTLS certificate) to the `/oauth/token` endpoint, Auth0 does not reject the request; instead, it issues an unbound bearer token without an error signal. The downstream API will accept it without proof of possession, making it replayable if intercepted. If the downstream resource server requires sender-constrained tokens, do not forward the unbound token. Reject it and return an error to the caller.
## Organizations support
When a user authenticates through an organization, the access token includes an `org_id` claim. OBO token exchange preserves this organization context throughout the delegation chain.
When Auth0 receives an OBO token exchange request with an org-bound access token, it validates:
* The `org_id` exists in your tenant
* The user (identified by `sub`) is a member of that organization
If validation fails, Auth0 rejects the token exchange request. If successful, Auth0 issues a new access token that:
* Contains the same `org_id` claim as the original token
* Applies the same organization-specific RBAC policies
* Makes the organization context available in the [`post-login` Actions trigger](/docs/customize/actions/explore-triggers/signup-and-login-triggers/login-trigger/post-login-event-object#event-organization) via the `event.organization` property