Documentation Index
Fetch the complete documentation index at: https://auth-test.auth0-mintlify.app/llms.txt
Use this file to discover all available pages before exploring further.
Before you start
Ensure you have:
- A Custom Domain configured Auth0 tenant configured for your application
- Auth0 CLI installed and authenticated.
- A post-login Action
- An Auth0 tenant session using the non-persistent sessions policy
- (Optional) Configure session’s Idle and absolute session timeout values
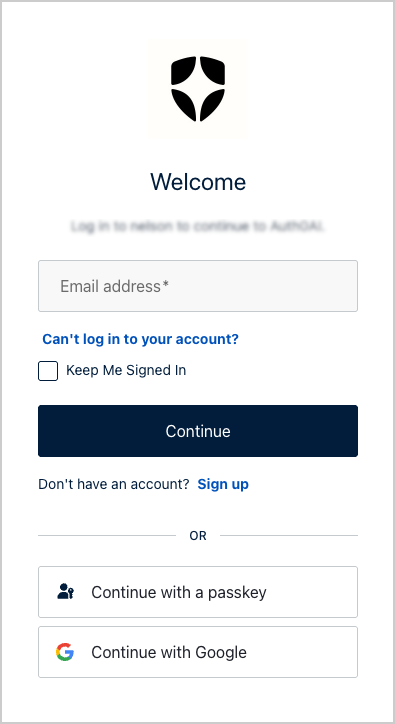
- If the Keep Me Signed In checkbox is selected, it sets a persistent session which survives browser restarts.
- If the Keep Me Signed In checkbox is not selected, it sets a non-persistent session which expires when the browser closes.
- Zero-trust browser session handling
- Minimal session persistence
- Trusted device overrides
1. Configure a Universal Login page and Add a custom prompt
To gather the user’s Keep Me Signed In preference, you need to customize Universal Login by configuring a page template and adding a custom prompt using Auth0 CLI.Optional: Enable the Universal Login page template
This step is only required if your tenant does not have a Universal Login template configured.
2. Add a Keep Me Signed In checkbox using Auth0 CLI
To add a checkbox into the Universal Login screen, follow these steps:Launch the customization editor
- Open the customization editor for the login-id or login prompt depending on your tenant configuration:
- Select standard for rendering mode
If you are unsure whether your tenant uses
login or login-id, refer to Auth0’s prompt customization.Configure the checkbox
Open the Partials option in the customization editor:-
Set Prompt to:
login-id(orlogin) -
Set Screen to:
login-id(orlogin) -
Set Partial to:
form-content-end
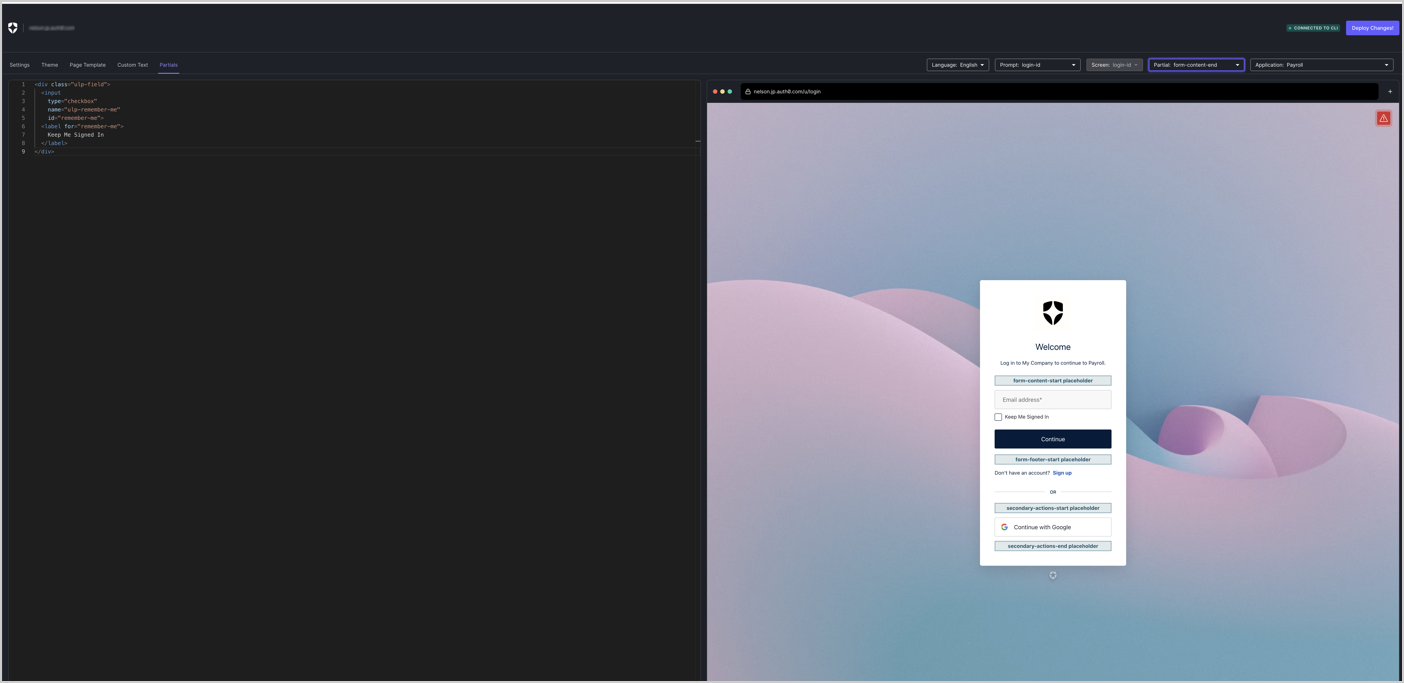
Deploy your changes
Select Deploy Changes in the top-right corner to save and apply the customization.Checkpoint
Log in using Universal Login. The login screen includes a Keep Me Signed In checkbox.3. Create a Post-Login Action using Auth0 CLI
Create a new file calledset-session-persistence.js for use with Auth0 CLI and add the following code:
set-session-persistence.js file:
id:
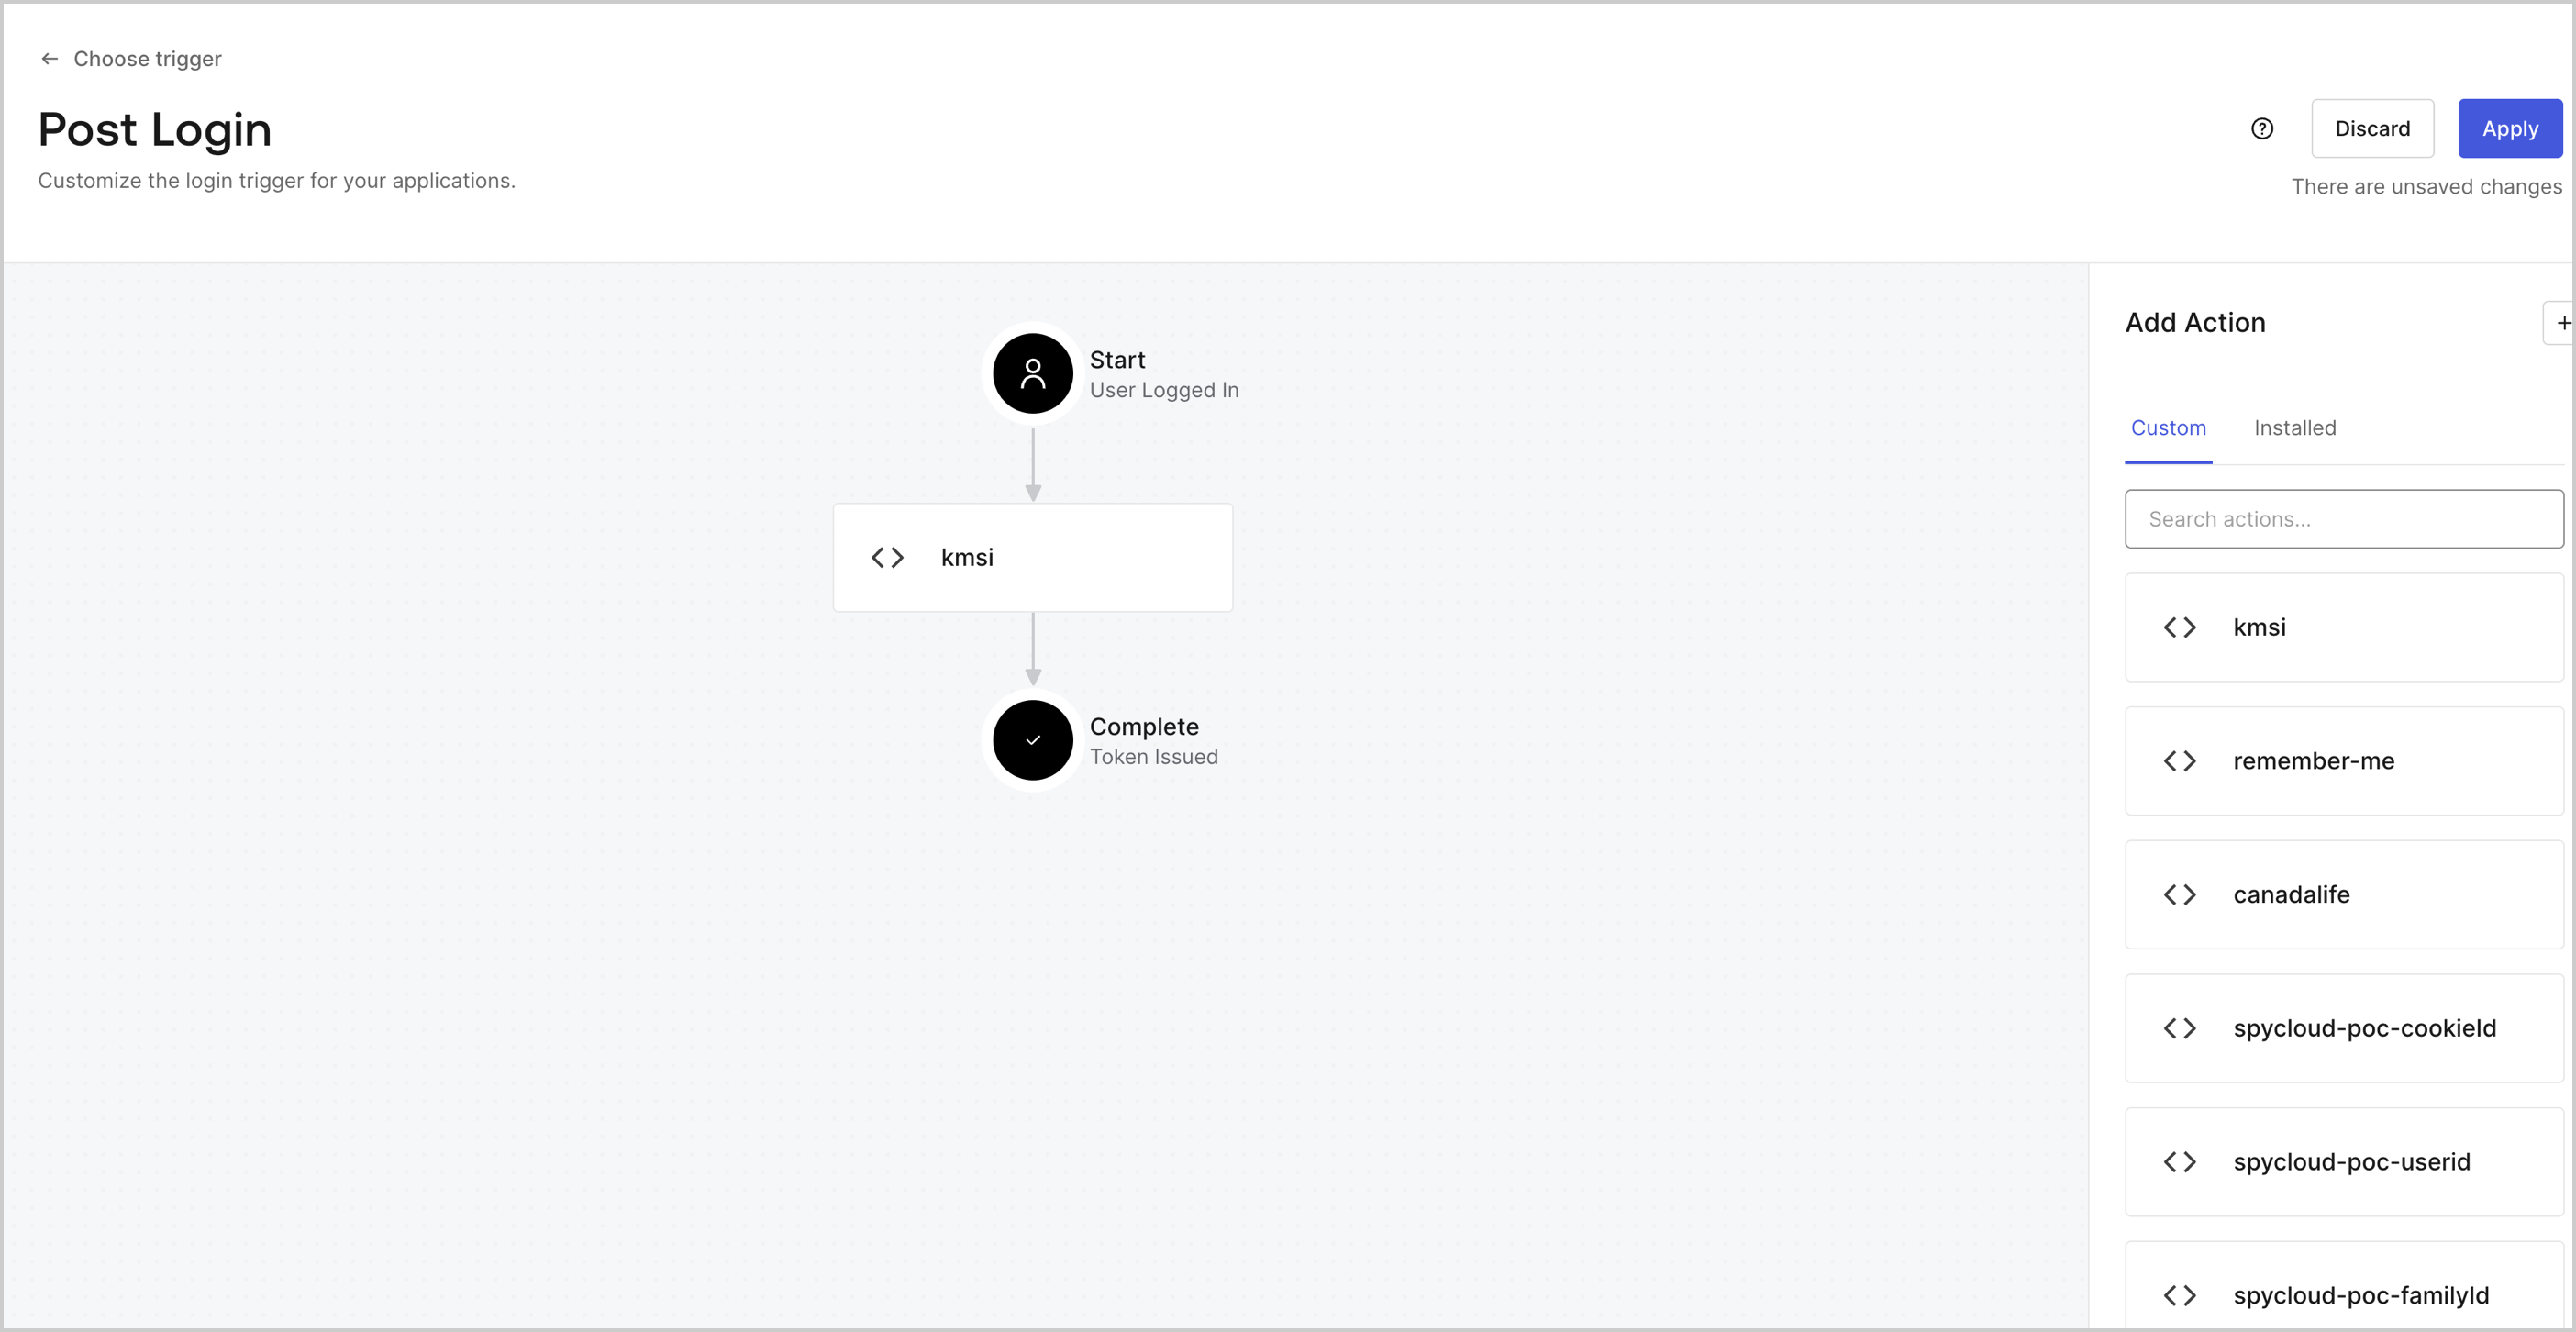
Set session duration for trusted devices
setCookieMode() only controls how the session cookie is delivered to the browser. A persistent cookie survives browser restarts while a non-persistent (session) cookie is cleared when the browser closes. It does not change the backend session’s expiration time. If you want trusted devices to have a longer session lifetime, you must explicitly set the expiration using api.session.setExpiresAt() or api.session.setIdleExpiresAt().api.session.setExpiresAt() or api.session.setIdleExpiresAt() alongside setCookieMode():
4. Test implementation
To verify the session behavior, you can: Log in using Universal Login, and select the Keep Me Signed In checkbox.-
In the tenant logs, search for (event types
sorssa)-
cookie: { mode: "non-persistent" } -
cookie: { mode: "persistent" }
-
-
Search for
event.session.cookie.modein your Actions